|
|
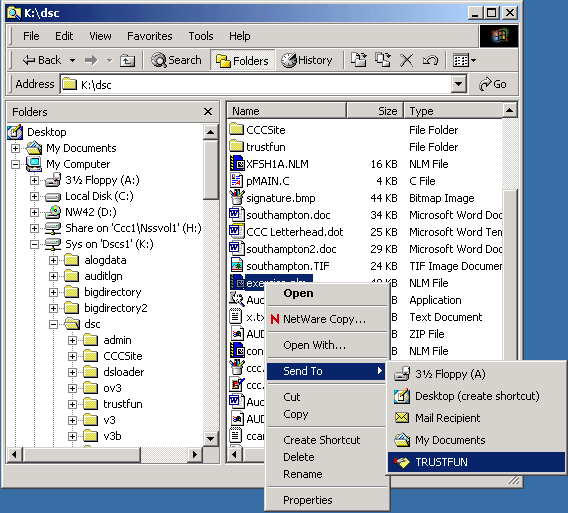
TrustFunT is designed to accept the
file for analysis as a command line parameter and therefore is built to run
from the WindowsT SendTo menu as shown below:

In order to get to this point, you need
to run the TRUSTFUN.EXE once to install the license key(s) and get the SendTo
shortcut established. Follow the installation procedure below:
-
Extract
the TRUSTFUN.ZIP distribution file into a directory. This directory should
be on a server if you want multiple people to use the tool. When each person
runs the tool the first time, he/she will be given the option of having
TrustFun create their own personal shortcut to it by placing the shortcut
in their SendTo folder on their own machine. There is only one file in the
distribution. TrustFun will create the INI file when you set the license
key. The INI file has no user-dependent information in it; therefore it
can be shared on the network. The EXE and INI files will be shared by everyone
since they reside on the servers.
-
Click
on the TRUSTFUN.EXE file. This will start the utility:

-
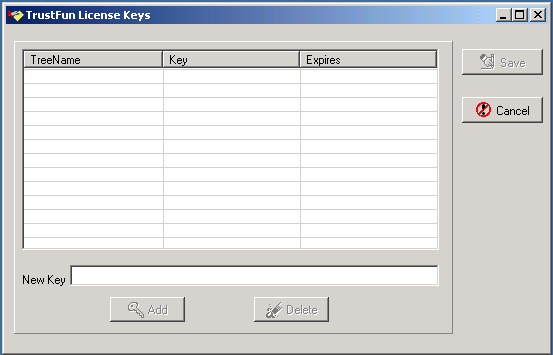
After clicking OK, the License dialog will start:

Paste
(Ctrl-V) the license key you received via email from the license key
generation form into
the "New Key" field and click "Add". If you have
other keys you can add them now or anytime later under the "Action" menu item.
Click "Save" to write the license keys into the TrustFun.INI file
and continue.
-
At this point, the base installation is complete. You and other users on
the network can setup TrustFun for workstation use by clicking on the TrustFun.EXE
file which will start in the following configuration:

Select
the "Add ShortCut" option to have a Windows shortcut added to you Windows
SendTo folder. Each user that wants to use TrustFun should perform this
operation.
-
After
this is done, you should be able to use the Windows Explorer to send files
or directories to TrustFun for analysis as shown at the top of this page.
|
